Jellyseerr Setup
Complete guide for adding Jellyseerr to OmniFetch.
Prerequisites
- Jellyseerr v1.0+ installed and running
- Access to Jellyseerr web interface
- Jellyseerr API key
Adding Jellyseerr to OmniFetch
Step 1: Locate Your API Key
- Open your Jellyseerr web interface
- Navigate to Settings → General
- Under the API section, find API Key
- Click Generate if no key exists
- Copy the API key to your clipboard
API Key Security
Keep your API key secure. Never share it publicly or commit it to version control.
Step 2: Add Service in OmniFetch
- Open OmniFetch app
- Go to Settings
- Tap "Add Service"
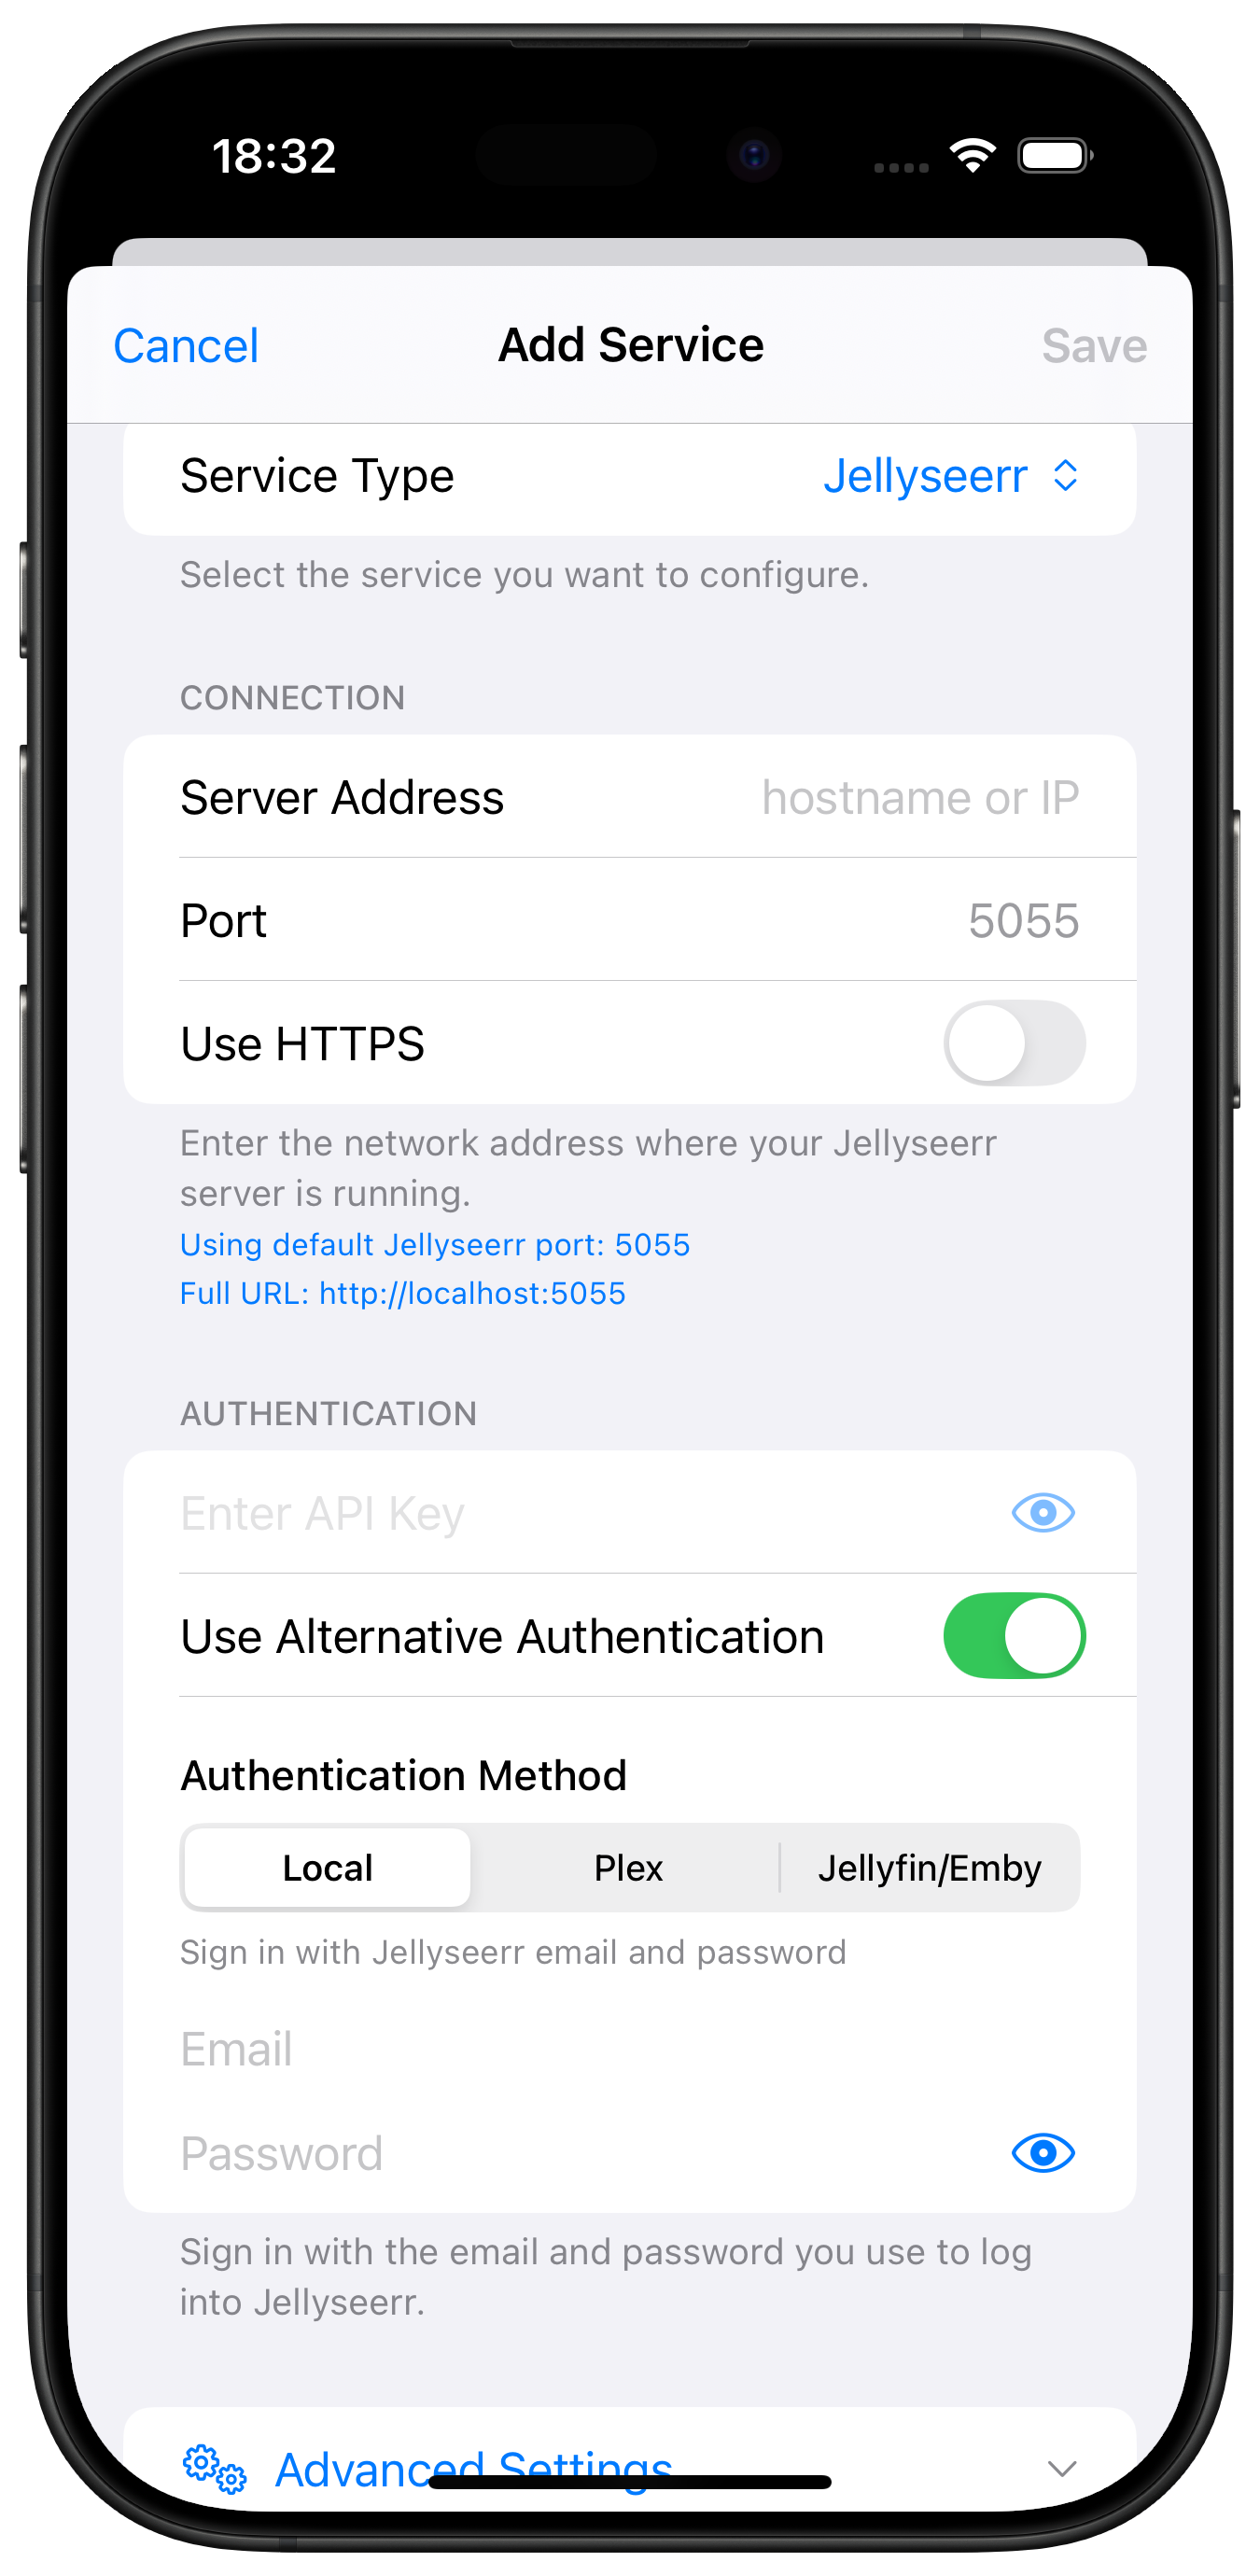
- From Service Type dropdown, select Jellyseerr
- Choose your Connection Type:
- Local: Direct connection to Jellyseerr
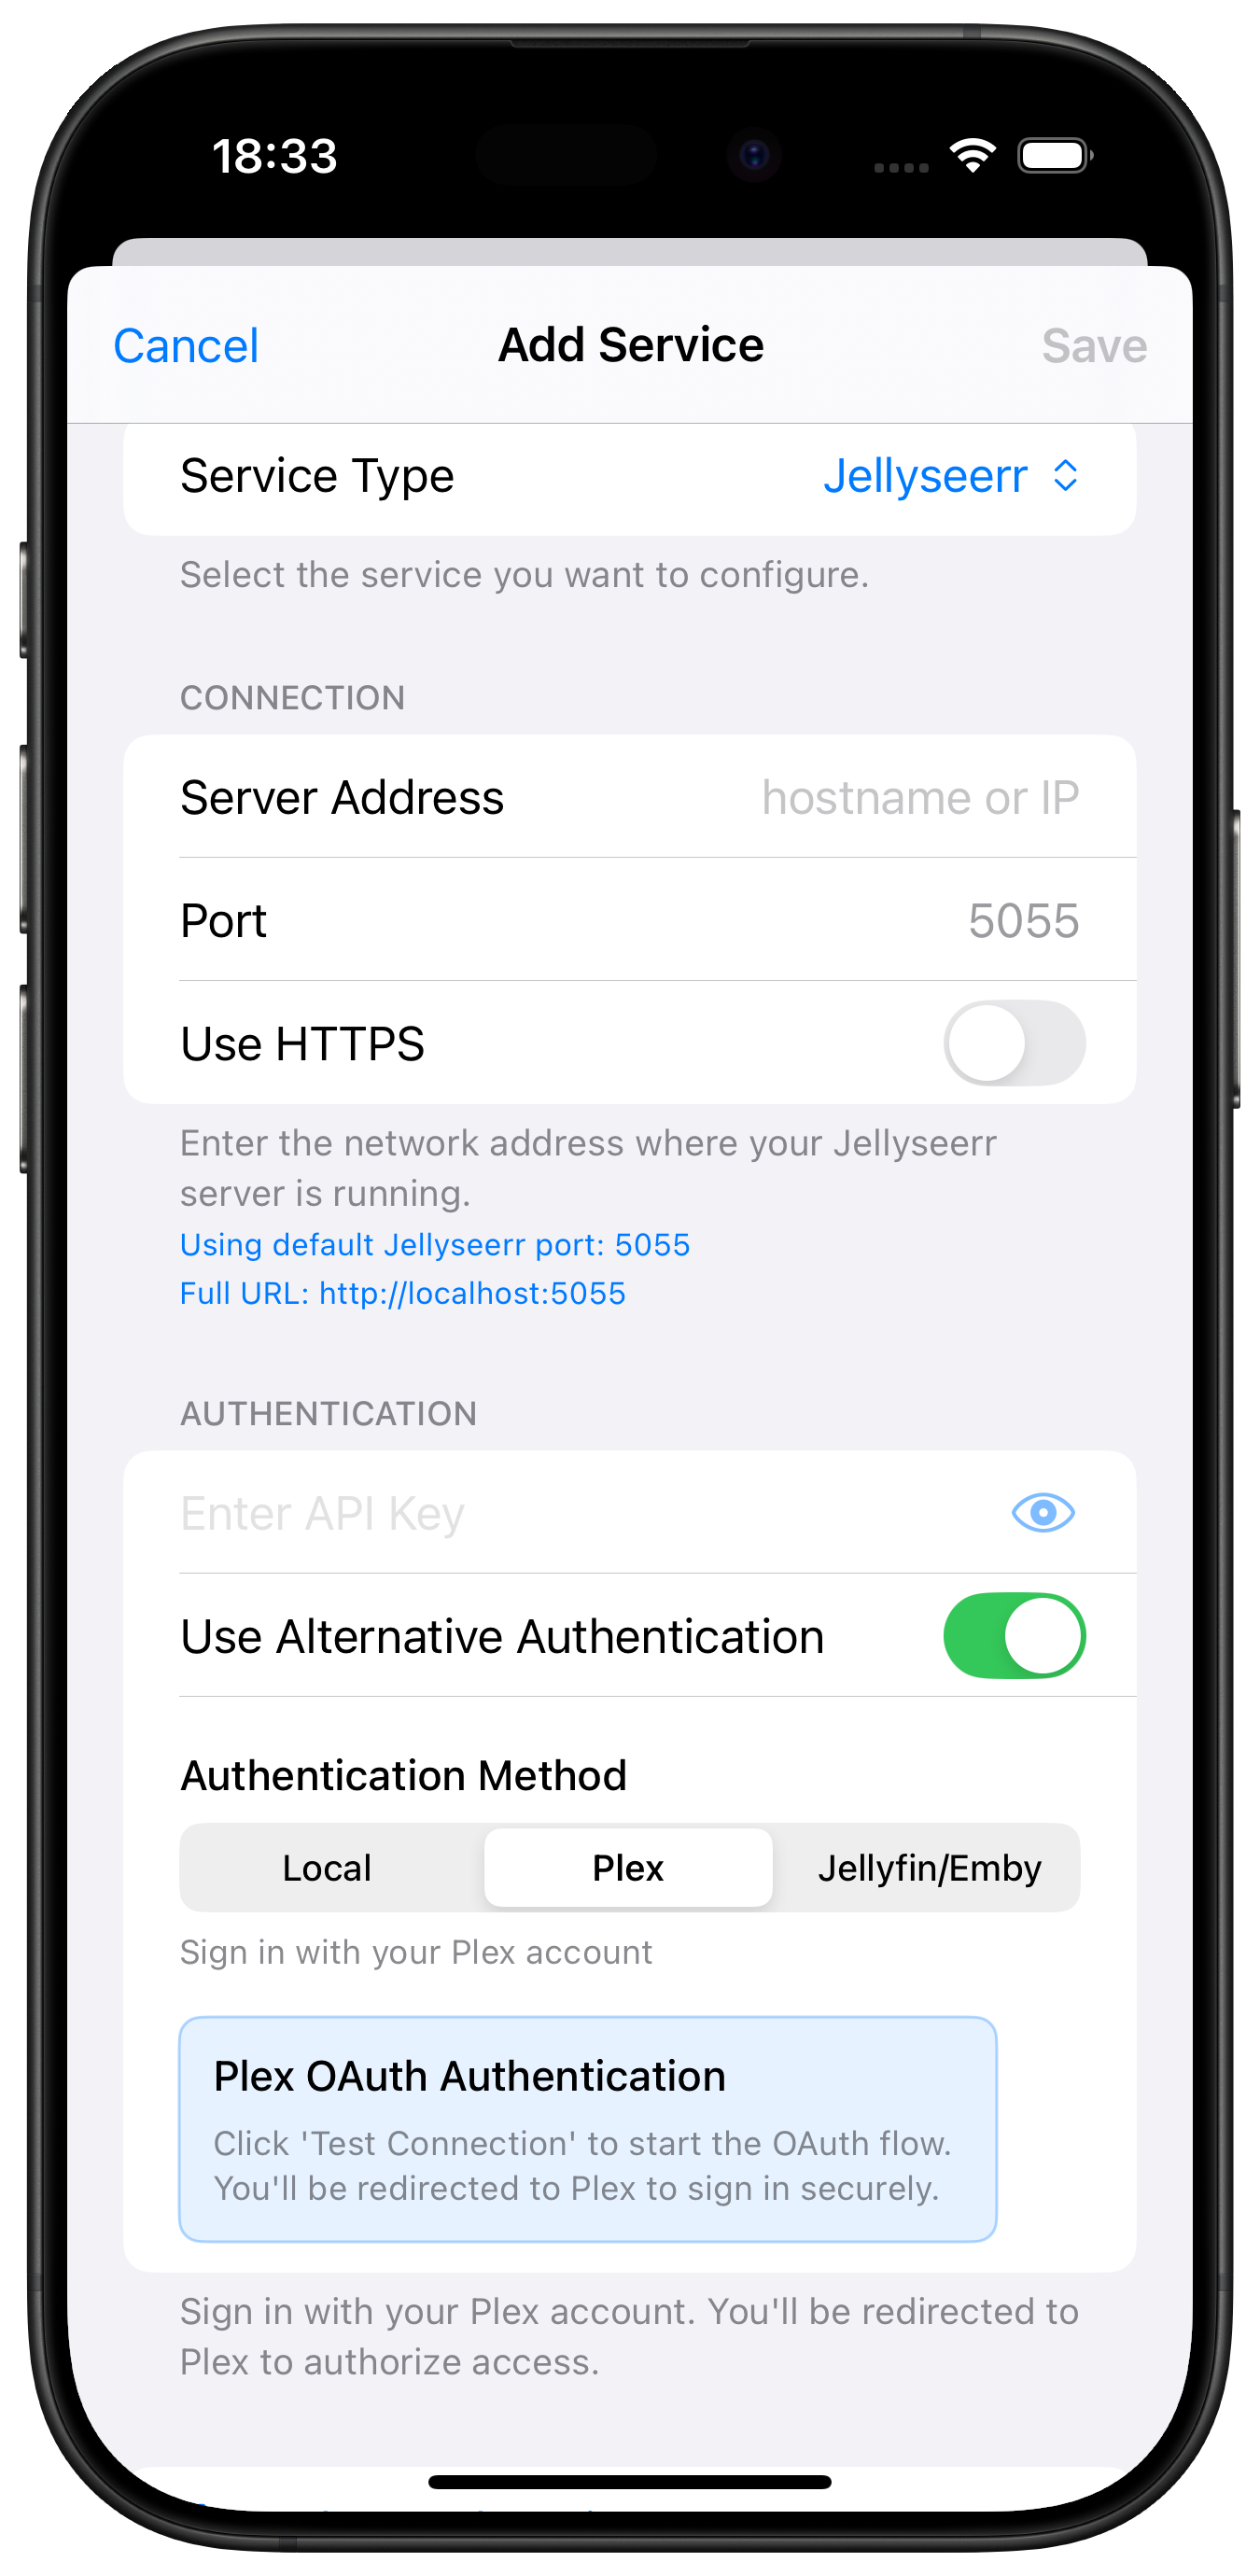
- Plex: Connect through Plex integration
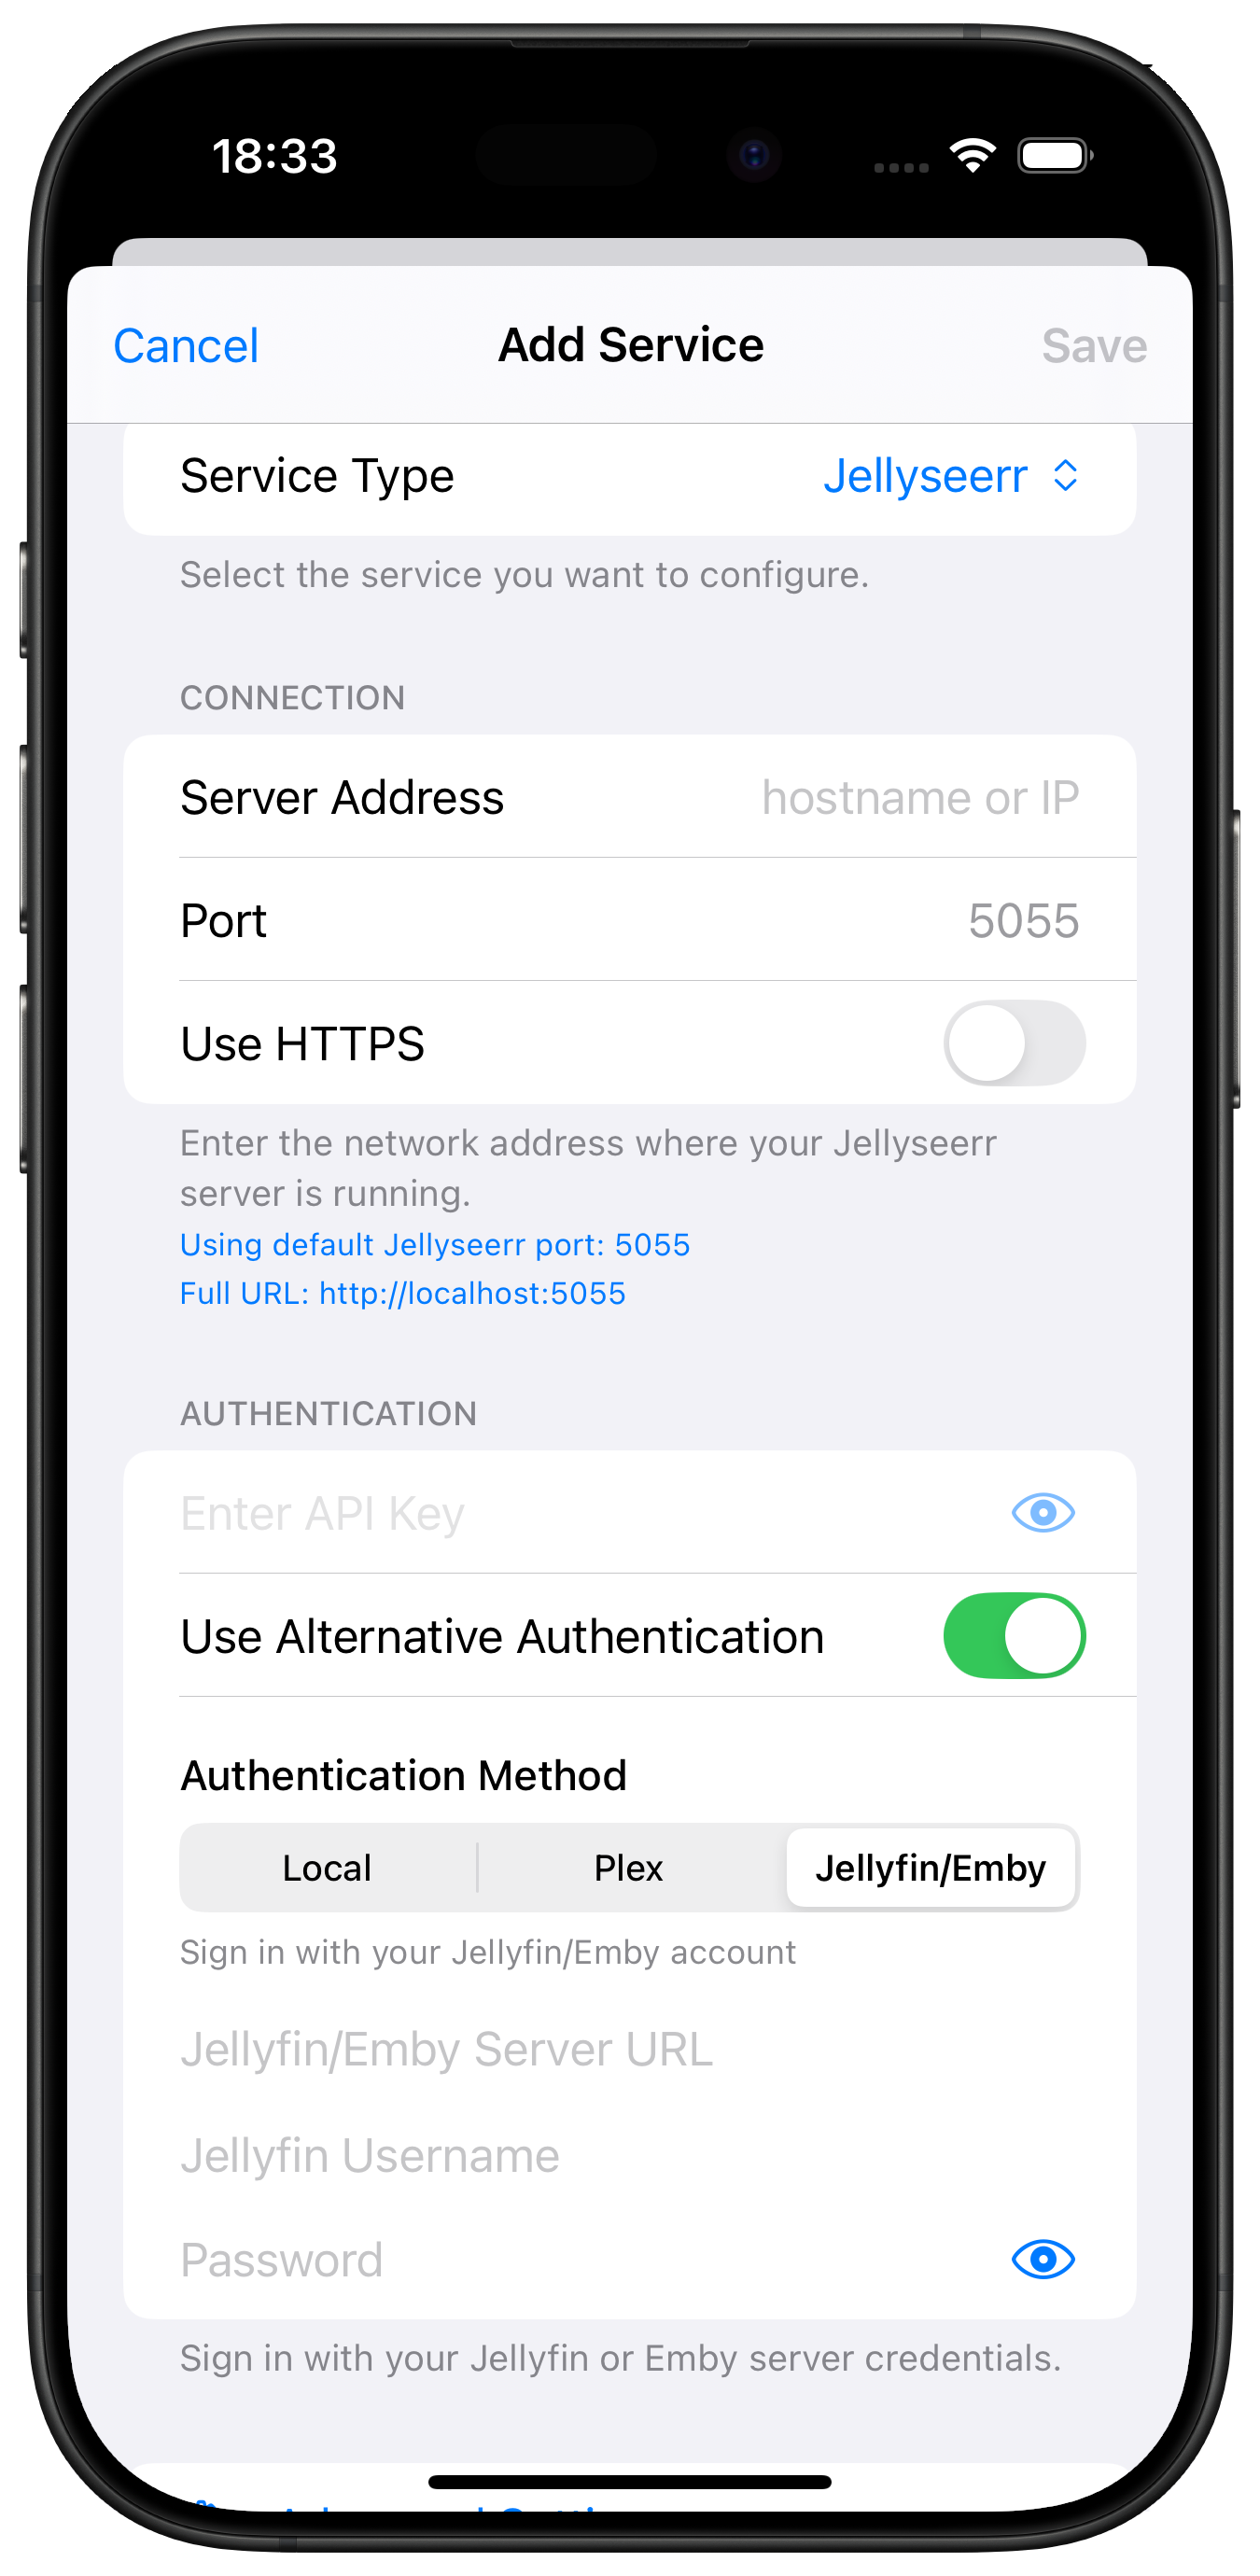
- Jellyfin: Connect through Jellyfin integration
Local Connection
Plex Integration
Jellyfin Integration
Step 3: Configure Connection
For Local Connection
Server Address
- Enter hostname or IP address only
- Examples:
- Remote:
jellyseerr.mydomain.com - Local:
192.168.1.100 - Docker:
jellyseerr(container name)
Port
- Default Jellyseerr port:
5055 - Change if using custom port
Use HTTPS
- Enable if using SSL/TLS
- Most local installations use HTTP
API Key
- Paste the API key you copied from Jellyseerr
- Ensure no extra spaces before or after
For Plex Integration
Plex Server Details
- Configure Plex server connection
- Jellyseerr requests will integrate with Plex
For Jellyfin Integration
Jellyfin Server Details
- Configure Jellyfin server connection
- Jellyseerr requests will integrate with Jellyfin
Connection Examples
Local HTTP: Server Address: 192.168.1.100, Port: 5055, HTTPS: Off Remote HTTPS: Server Address: jellyseerr.mydomain.com, Port: 443, HTTPS: On Docker: Server Address: jellyseerr, Port: 5055, HTTPS: Off
Step 4: Advanced Settings (Optional)
For additional configuration options, tap Advanced Settings:
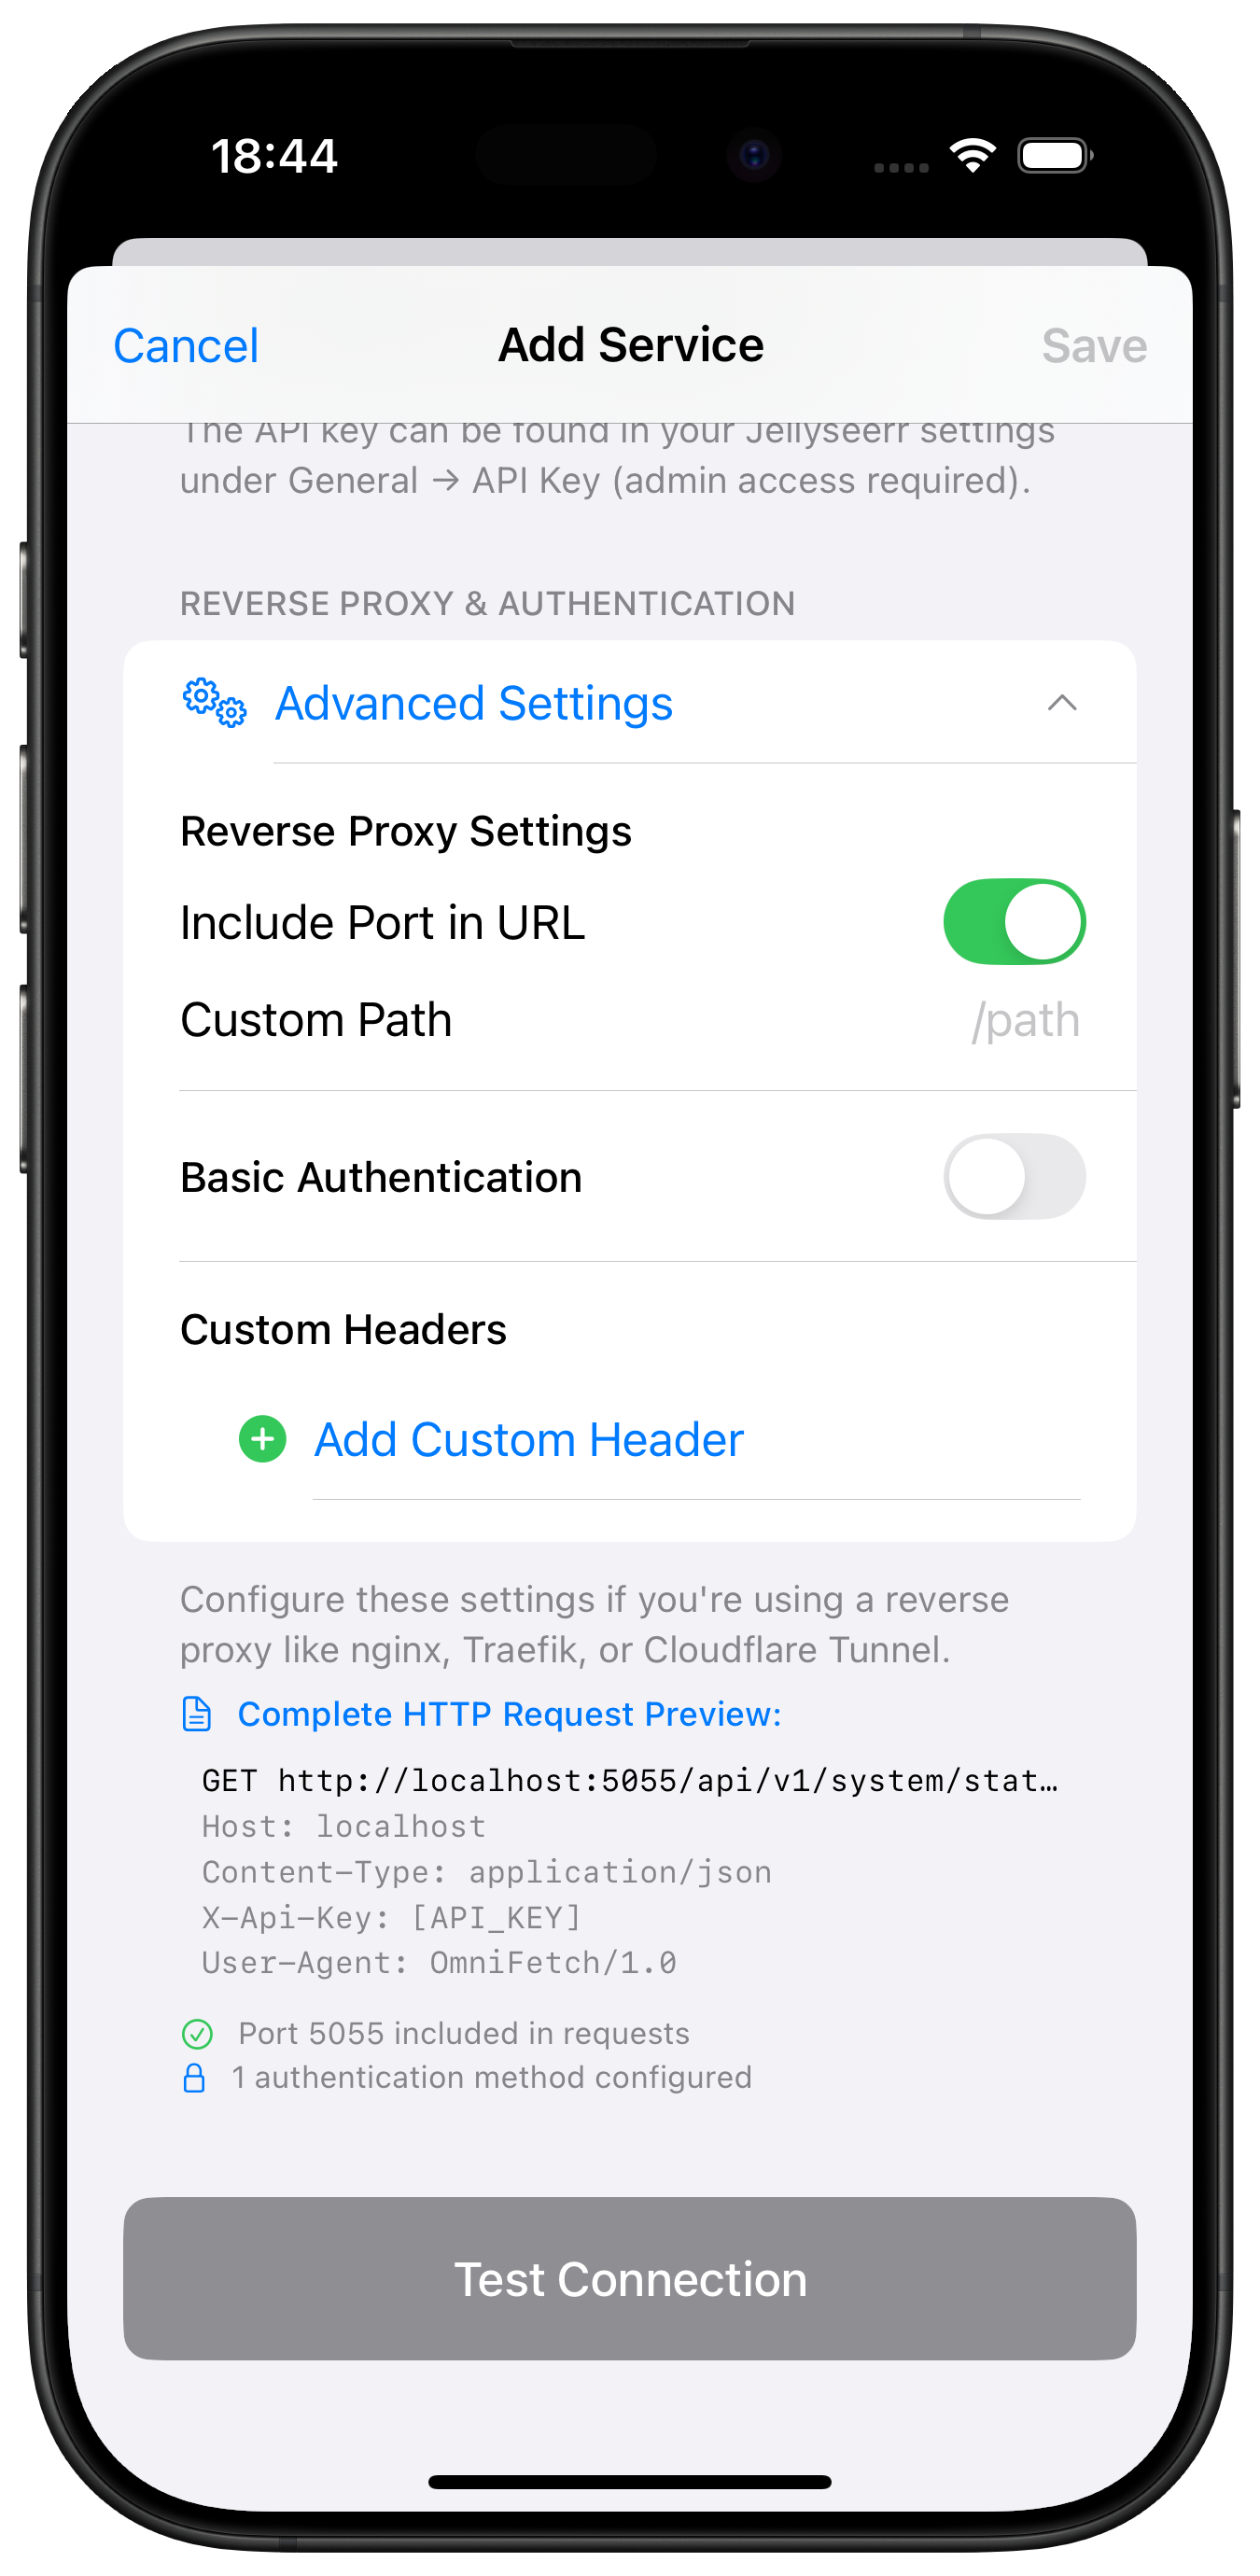
Advanced Options Include:
- Custom timeout settings
- SSL certificate validation
- Request headers
- Base URL path
- Authentication method
Advanced Settings
Most users can skip advanced settings. Only configure these if you have specific requirements or custom Jellyseerr setup.
Step 5: Test Connection
- Tap "Test Connection"
- Wait for the test to complete
- Look for the success message
If test succeeds:
- ✅ Connection established
- ✅ API key valid
- ✅ Jellyseerr version compatible
If test fails:
- ❌ Check URL format and accessibility
- ❌ Verify API key is correct
- ❌ Ensure Jellyseerr is running
Step 6: Save Configuration
- Once test passes, tap "Save"
- Jellyseerr will appear in your services list
- Initial data sync will begin
Post-Setup Configuration
Enable Notifications (Beta)
If you have beta access:
- Go to Settings → Notification Settings → Push Notifications
- Enter your Private Beta Key
- Save to enable webhook notifications
Generate Webhook ID
For webhook notifications, you need a unique ID:
- Go to Settings → Developer
- Tap Generate ID for Service
- Select Jellyseerr
- Copy the generated ID
- Configure webhook in Jellyseerr (see webhooks guide)
Configure Refresh Intervals
- Open Jellyseerr service in OmniFetch
- Tap settings icon
- Adjust refresh intervals:
- Requests: 5-15 minutes
- Activity: 10-30 minutes
Set Notification Preferences
- Go to Jellyseerr notification settings
- Enable desired events:
- Request Approved ✅
- Request Available ✅
- Request Declined
- New Request (if admin)
Push Notification Setup
For detailed webhook and notification configuration for Jellyseerr, see the Jellyseerr Webhooks Guide.
Request Management
View Requests
- Tap Jellyseerr service in OmniFetch
- Browse pending, approved, and available requests
- Filter by type (movies/TV shows)
- Search for specific requests
Request Actions
For Administrators:
- Approve pending requests
- Decline requests with reason
- View request details and comments
For Users:
- View your submitted requests
- Check approval status
- See availability notifications
Verification Steps
After setup, verify everything works:
- Check Status Indicator:
- Green = Connected
- Yellow = Warning
Red = Error
View Requests:
- Pull to refresh
Check recent requests
Test Notifications:
- Submit a test request
Verify push notification received
Check Statistics:
- View request counts
- Verify data accuracy